Ben Rothman - WordPress Developer Blog - Page 2 of 6 - ©2023 Ben Rothman, Web Developer

Blog

My blog is dedicated to sharing my expertise, recommendations, and tutorials on WordPress. If you're interested in developing with WordPress, my blog is a valuable resource that you won't want to miss.

Categories
Web Development WordPress

WordPress: Query Loop Syntax

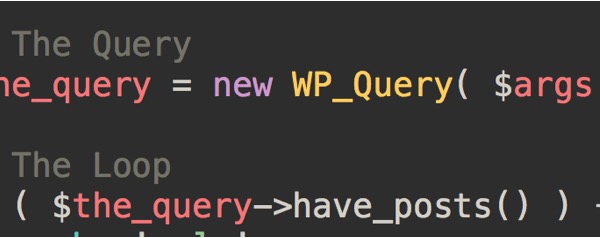
This post is long overdue on this blog. I have personally used this method of querying and iterating through the results many many times. Below is the standard structure for a query and a loop. This query and loop will find all ‘post’s on this WordPress website that have the ‘people’ taxonomy with ‘bob’ checked off.

<?php
// define the search arguments
$args = array(
	'post_type' => 'post',
	'tax_query' => array(
		array(
			'taxonomy' => 'people',
			'field'    => 'slug',
			'terms'    => 'bob',
		),
	),
);

// The Query
$the_query = new WP_Query( $args );

// The Loop
if ( $the_query->have_posts() ) {
	echo '<ul>';
	while ( $the_query->have_posts() ) {
		$the_query->the_post();
		echo '<li>' . get_the_title() . '</li>';
	}
	echo '</ul>';
} else {
	// no posts found
}
/* Restore original Post Data */
wp_reset_postdata();
Categories
Project Web Development WordPress

How to Install plugins onto my WordPress site using Composer

Installing plugins is easy enough as long as you have a basic understanding of composer and know how to use it, and this guide will explain the process.

The first thing you need to do is make a composer file in a file named composer.json. That may sound obvious, but then first steps often are:

{
	"name": "brothman01/awesome-project",
	"authors": [
	{
		"name": "Ben Rothman",
		"homepage": "https://benrothman.org",
		"role": "Developer"
	}
	],
	"repositories": [
	{
		"type":"composer",
		"url":"https://wpackagist.org"
	}
	],
	"config": {
	"platform": {
		"php": "7.3"
	},
	"allow-plugins": {
		"composer/installers": true
	}
	},
	"require": {
	"wpackagist-plugin/woocommerce": "dev-trunk",
	"wpackagist-plugin/chatpress": "2.0.1",
	"wpackagist-plugin/advanced-custom-fields": "5.12.3"
	}
}

The above JSON is the final composer file, so if you are seeing things in there that don’t make sense yet, don’t worry I am going to explain them.

[We want to use composer in this project to install plugins into the plugin directory, not the usual vendor directory, so we use the oomphinc/composer-installers-extender plugin to do that by requiring it as a dependency and then setting custom installer paths in the “extra” section, and as you can see that custom install path is set for all packages of type “wordpress-plugin”.]

We want to install WordPress plugins hosted in the official repository AND we want to install them to the correct plugins directory in the WordPress install. Wpackagist.org is a great solution for installing WordPress plugins from the official repository via composer to the correct place, so we have to add a url for that to the “repositories” section.

The rest is just requiring each plugin as a dependency package in the JSON file. To install a specific plugin from the public WordPress repository, just require wpackagist-plugin/{the-plugin-slug} and either the version or dev- then the svn directory to get the files from.

I hope you try this and come to agree that this process is easy thanks in large part to the work done by the developers of wpackagist, who designed their software to enable composer to do exactly this with ease. Enjoy!

Categories
Project Web Development

How to select VS Code as the default editor for filetypes in FileZilla on Ubuntu

FileZille, the common FTP or SFTP app gives users the flexibility to edit files on remote servers in the editor of their choice before they upload the changed file. Many users (myself included) like to use VS Code to edit files that are .php, .css, .js or .html files. But Ben, how do I configure FileZilla to use VS Code? Check out the easy solution below!

Step 1:
Go to Settings of FileZilla.

Step 2:
In Settings, go to the File Editing option

Step 3:
And in that choose option Filetype associations

Step 4:
In the large text field, add “php /snap/bin/code” for PHP.

And similarly for the different file types:
For js add “js /snap/bin/code
For css add “css /snap/bin/code
For html add “html /snap/bin/code

Enjoy!

Categories
Plugin Web Development Website WordPress

WordPress: Cloudflare Plugin

Obviously not all WordPress sites use cloudflare, in fact many of them don’t. BUT, if you have a WordPress site and you happen to be one of the people who uses Cloudflare with the site like I do from time to time then you need the Cloudflare plugin.

Why do we need the plugin? We can control everything by logging into Cloudflare and changing the configuration there. That is true, but things like purging the server cache or turning on “development mode” (a great feature) are possible without leaving the comfort of the site if you have the Cloudflare plugin installed and configured.

Just because I know any readers are wondering, “Development Mode” suspend Cloudflare’s edge caching, minification, Polish and Railgun features for three hours so that changes to images, CSS files or Javascript files can immediately be seen by users of the site. Although the site will not load as fast, development mode is good for development since the developer is constantly changing those files and using cached versions would be silly and cause the developer to think there are problems with the new code when there are none.

Categories
Web Development WordPress

Publishing failed. The response is not a valid JSON response.

After a site migration I got this error. Don’t panic, this was an easy fix, go to Settings > Permalinks and choose ‘Post name’ then press the save button. Easy right? Happy WordPressing!

Categories
Website WordPress

Could not create directory. Installation failed.

This happens sometimes after migrating from one host to another. The problem boils down to a permissions issue. If you copied the uploads folder to the new server via an ssh connection sometimes the owner of the files copied will be whoever you connected with to perform the copy.

If you want to confirm that this is in fact the issue you can run:

$ ls -ld /var/www/html/wp-content/

and you may see something like:

`

drwxr-xr-x 5 root root 4096 Feb 11 08:29 /var/www/html/wp-content/`

Which says that root is the owner because that is the user that copied the file onto the server, even though for WordPress to write to the folder, the owner needs to be www-data. This issue can easily be fixed by issuing the following command:

$ sudo chown -R www-data:www-data /var/www/html/wp-content/

Now the owner will be www-data and you will be able to upgrade files again! Happy WordPressing!

Categories
Website WordPress

How to Login to WordPress

You just installed WordPress, you are feeling tech-savvy… you basically invented the internet, haha

You were able to create your nice site, or maybe got started, but you quit your browser or logged out or something else logged you out and now you just want to get back onto the WordPress dashboard. When you first set up the site it logged you in automatically, getting back in is only a little harder.

In your URL bar just navigate to <yourwebsite.com>/login: (you may have customized the URL or something so that /login will not work anymore, but this method is the default and will work as long as you did not customize anything) ((if you know what I mean then you know if you customized the URL, if you know, you know))

That simple step was the first of two steps, both of which are easy! After entering the URL described above, you wil be brought to the WordPress login page:

The above picture is what it looks like by default, but you can customize your login page if you want. Type in the username and password combo for the administrator account that you set up when you first created the website, click “Log In” and BAM, you are now on the WordPress Dashboard pictured below:

Your dashboard may look slightly different if you have installed plugins or customized it in other ways, but the dashboard is the dashboard. If you see something that resembles the image above then you have achieved great success and you are logged in!

Categories
Web Development WordPress

WordPress 5.9 “Joséphine”

Introducing 5.9, “Joséphine”. Named in honor of acclaimed international jazz singer Joséphine Baker, this latest, most versatile WordPress release is here: download it or update it directly from your dashboard.

As a lifelong civil rights campaigner, Joséphine Baker believed that all people could live in harmony together, just as different instruments in a jazz band blend together to make a whole piece. Turn on a playlist from your favorite music service and enjoy her famous renditions of “You are the greatest love”, “Sans Amour”, and “Love is a Dreamer” as you discover all the features of this brand-new WordPress release. 

Categories
Travel WordCamp WordPress

WordCamp US 2021

Ok I absolutely missed a lot of WordCamps but at least I could attend this one virtually.

There were some interesting talks about Gutenberg Blocks and I was impressed with how seamlessly the speakers were able to move to using the online platform to give their talks instead of in-person.

I and many people loved going to the talks live which will hopefully be coming back after this pandemic but for now online is the best we can get.

Categories
Web Development WordPress

Adding User-Specific Content to a WordPress page

There are many ways to go about this but in this post I will be focusing on using php in your WordPress page template to add content that can only be seen by users who are logged into administrator accounts.

Let’s say we have a secret message for administrators “The prize is behind door number 2”. We don’t want to share this invaluable, secret message with just anyone, we only want our friends who have administrator accounts on our website to be able to see the message.

We can create this functionality easily with WordPress using some of it’s many defined PHP functions. All we have to do are the three lines of code below:

if ( is_admin() ) {
     echo 'The prize is behind door number 2';
}

We can also use this same method with a different function to require the user to be logged in to see the message:

if ( is_user_logged_in() ) {
     echo 'The prize is behind door number 2';
}

We can even use this technique to show the message to a specific user and no one else, for a personalized message or something using the code below:

if ( '3' == get_current_user_id() ) {
     echo 'The prize is behind door number 2.';
}

I hope these three short examples demonstrate to you how powerful WordPress custom code using the pre-defined functions can be. Using a relatively small amount of code, I can extend this functionality to add some really useful new features to my website and so can you. Happy WordPressing!